An all-ages holiday project: How to make a long-lasting succulent centerpiece
Here’s my confession: I am a craft-a-phobe, so challenged at craft projects that my loving and supportive friends have to dig deep to find positive adjectives for my finished works. Usually they resort to that time-honored “Nice job!” and hastily pour themselves another tumbler of wine.
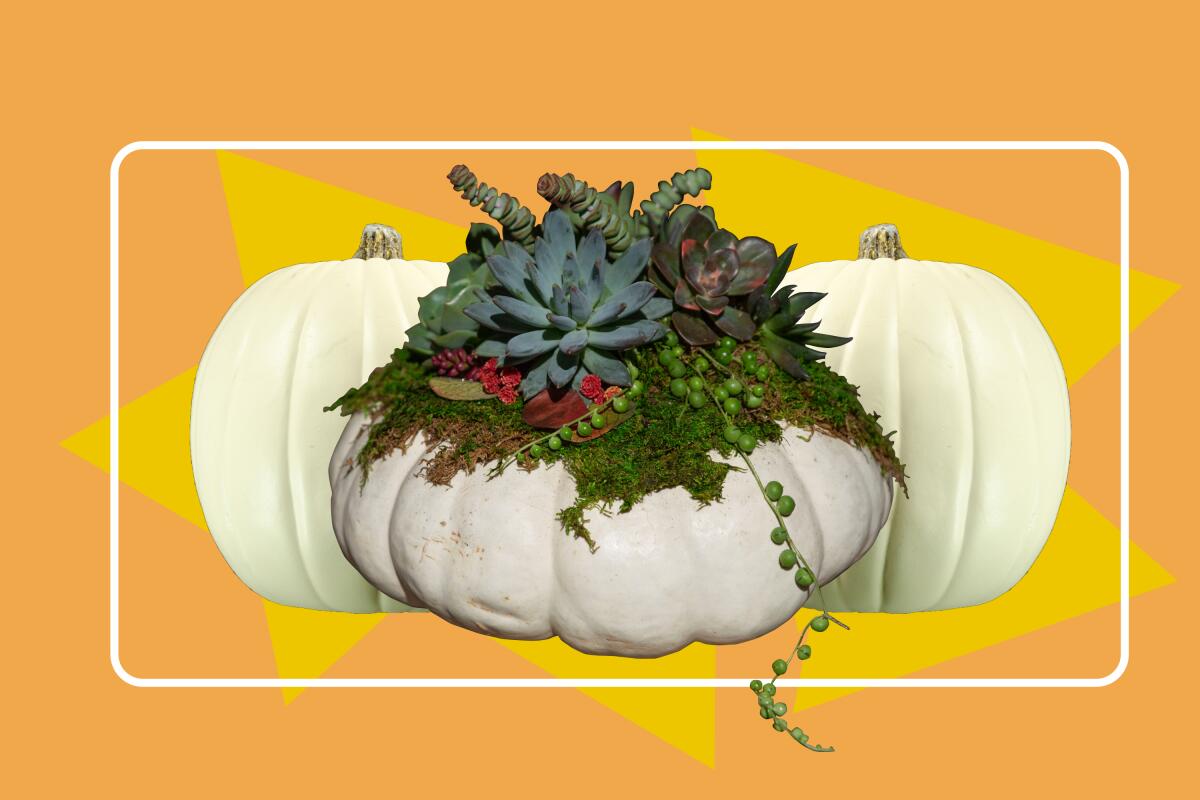
But I’m here to tell you that even this craft-challenged woman was able to produce several gift-worthy succulent pumpkins, because, really, they were that easy (and fun) to produce. If you buy your pumpkins now, when they’re relatively plentiful at stores, you can make some super cool presents that should be thriving come December.
All you really need is a pumpkin, sphagnum moss, tacky glue, florist wire and a big assortment of succulents pruned from your plants or someone else’s (with permission, of course).
We’re entering prime season for building habitat in your garden by adding native plants to your yard or patio pots, but don’t miss other plant-related events in L.A.
It’s especially fun to gather a group of friends for this project, with everyone bringing their own gourd and a nice variety of succulents to share in the center of the table.
When I did this with friends, they came in as doubters, but we all had a terrific time and made some gorgeous succulent centerpieces to boot.
Here are the instructions we used — a step-by-step primer by Brianne Bird, manager of Rolling Greens on Beverly in L.A.’s Fairfax neighborhood.
One of the first things you might notice about Bird’s technique is that it differs from many on social media, which use hot glue to secure the succulents to the pumpkins. Bird uses florist wire shaped into hairpins — a technique I found to be very easy to execute, and certainly safer. (I have more than one scar from glue gun burns.)
Hot-glue users say the heat won’t hurt the succulents, but Bird isn’t so sure. “I just hate to put that much heat on their roots,” she said. “They’re delicate living things. We should have respect for the living plants.”
The designer and author is known for her bohemian decorating sense, with a strong emphasis on plants as a living and ever-changing part of the home environment.
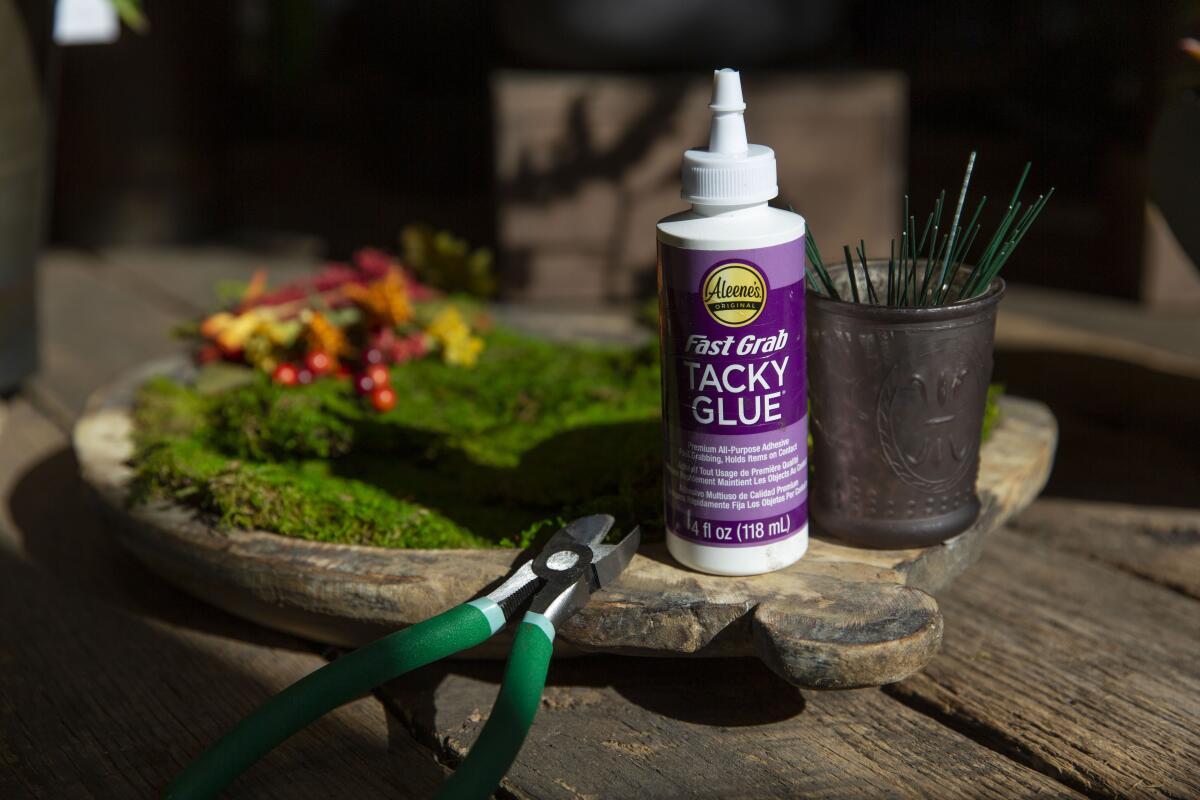
Step 1: Assemble your materials
▶ A flat-topped pumpkin or gourd. A white pumpkin works well for yuletide decor, but with so many colorful gourds being sold today, here’s where you can be creative. For instance, if you can’t find a pumpkin, use a colorful turban squash with the flat side up, so the knobby part is on the bottom (make sure it isn’t wobbly). The size of the pumpkin is up to you and your decorating needs. (Bird created 25 mini-succulent-pumpkins as guest gifts for a baby shower.)
▶ A variety of short or cascading succulents, no more than 3 to 4 inches tall. Bird recommends using 10 to 12 succulents for a 12-inch diameter pumpkin. For her demo pumpkin, Bird chose a variety of succulents, including the aptly named string of pearls, curly caterpillar-like sedums and the squat but endlessly colorful and bizarre echeverias. Aim for a range of colors and at least one large-ish, showy succulent that will be your anchor. Succulents can be rooted or trimmed from leggy plants in your yard (or maybe from the yards of generous friends or neighbors; invite them to the party!) Remove planted succulents from their pots and shake excess soil off their roots. (If you’re going the party route, it’s best to do this outside before guests arrive.)
Maybe your first-ever victory garden wasn’t a smash success this summer, but don’t give up now. Fall is prime planting time for edibles in Southern California, a more forgiving time with fewer demands for water or worries about scorching your plants. Now is the time to plant berries for spring harvest as well as a lush palette of greens, root crops, peas and brassicas for harvest throughout the winter.
▶ Tacky glue (fast-drying works well).
▶ Sheet moss. You’ll need enough to cover the top of your pumpkin twice (you’ll need the extra moss for filling in gaps). Sheet moss, a preserved dead moss, is available at most craft stores and some nurseries and florist shops.
▶ Wire cutters
▶ At least one package of 22-gauge florist wire, cut into 3-inch pieces. Unlike other techniques that call for hot-gluing succulents to the moss, you will be bending the wire into the shape of hair pins and using it to attach the succulents to your moss, so figure you’ll need at least 20 to 24 “pins” per succulent.
▶ At least one branch or bouquet of faux berries, leaves or other accents to add a bit of seasonal color. Note that you can change these little accents to reflect the upcoming holidays.
▶ A waterproof tablecloth to protect your table and make for easy cleanup, especially if you’re doing this inside.
Fall is prime planting time for Southern California, but after summer your garden soil gets depleted of the nutrients it needs to keep plants happy, so before you start your fall garden, take time to add fresh amendments to your soil, such as compost and aged manure.
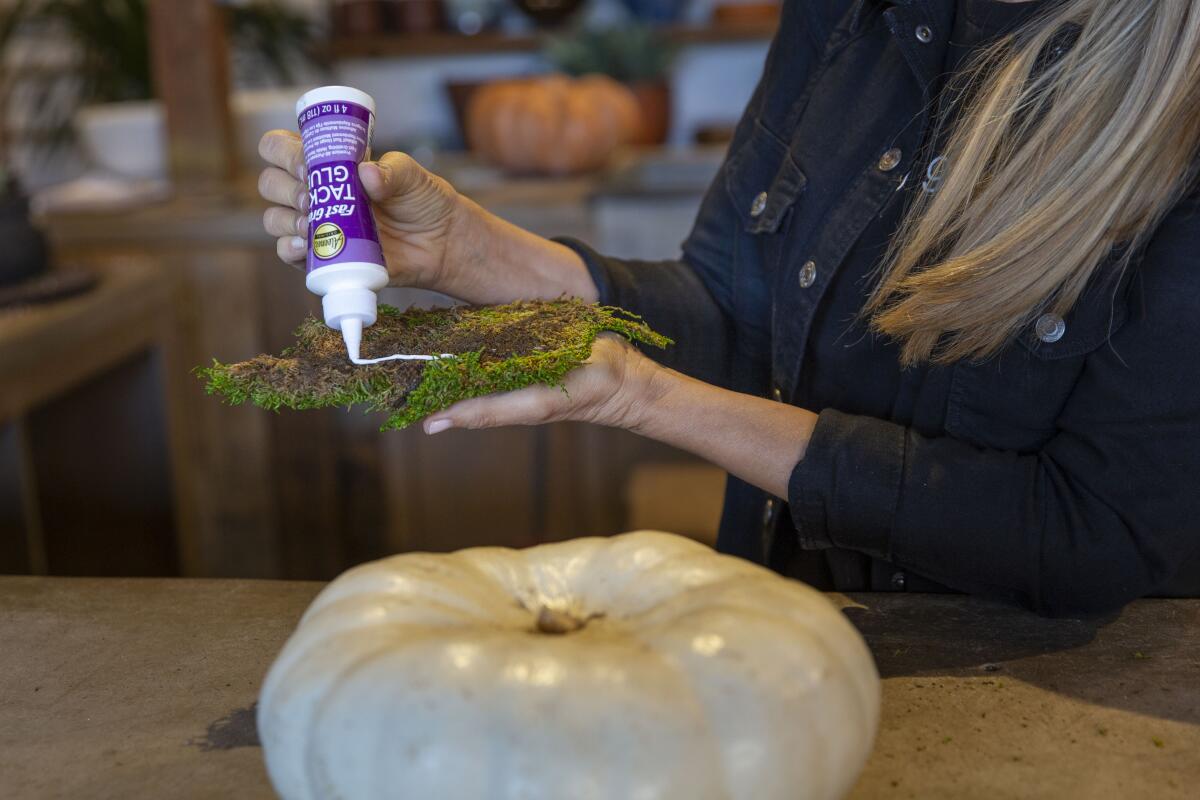
Step 2: Glue the moss to your pumpkin
If your pumpkin has a stem, carefully pare it a bit without piercing the flesh. Pruning shears or a serrated knife work. Take enough sheet moss to cover the top of your pumpkin (you might have to do this in pieces) and spread glue thickly on the brown backside, like mayonnaise on a piece of bread. Press the moss on top of the pumpkin, glue side down, green side up. You’re looking for a lopsided fit, so it covers the top of the pumpkin like a bad toupee. The goal is to make it look rustic and natural. Take a few minutes to let the glue set (this would be a good time to bring out the snacks and open the wine). If you don’t use fast-drying glue, do this step the night before, or several hours before the party, to be sure the moss is firmly adhered.
Step 3: Pin succulents into place
Now comes the fun part — arranging the succulents on the moss. If you’re working with a group, put all the succulents, minus their soil, in the middle of the table so people can choose the ones they want. Bird suggests starting in the middle with your tallest or most dominant succulent and then building out from there. Take a bit of extra moss and pin it over the root, the way you would put in a hair pin to hold a French twist bun.
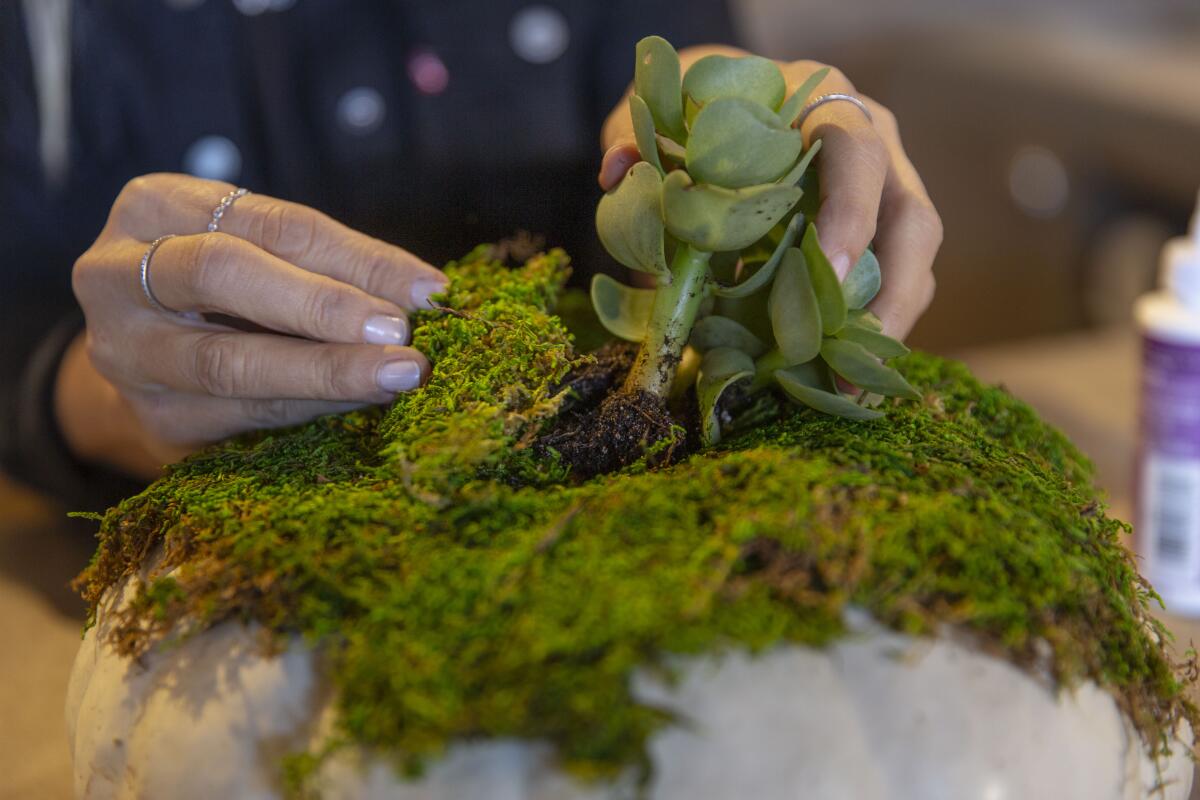
As you add succulents, cover their roots with additional moss before pinning them into place. Important: Pin into the moss, not the pumpkin flesh. Pumpkins will last for months if their shells are intact; once they are pierced, they immediately start to mold and disintegrate.
How to pick the best apples and make the best apple butter to preserve autumn in a jar.
Step 4: Add seasonal embellishments
Bird recommends buying a few inexpensive sprays of faux berries, leaves and/or grasses to tuck in among the succulents to add extra color. She breaks apart the bouquets to tuck in small accents around her display. Choose accents that won’t dissolve or run if they get wet, because you will be watering the succulents from time to time.
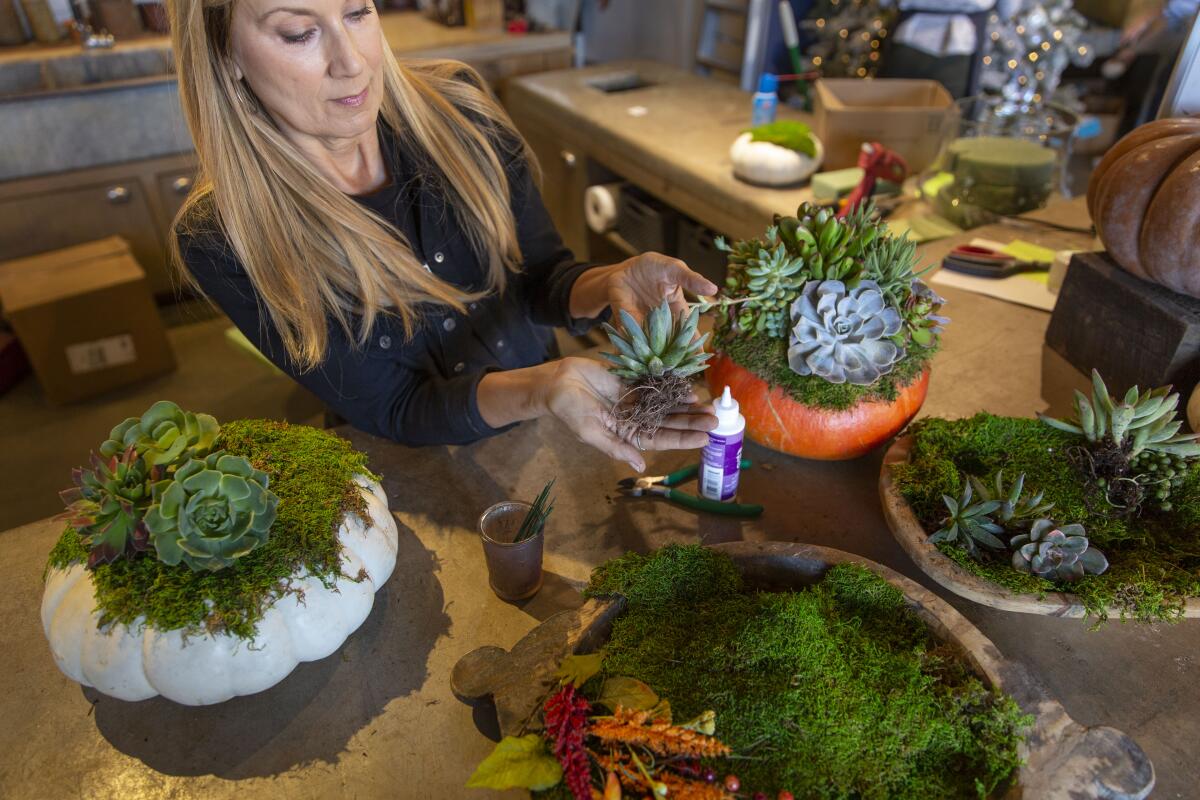
Step 5: How to keep your masterpiece healthy
Take a minute to bask in the glory of what you’ve created, admire the work of your friends and then tattoo Bird’s last bits of advice on your forehead:
DON’T MIST AND DON’T OVERWATER!
First, succulents prefer life on the dry side. If they get too wet, their little roots will rot, Bird said, so water sparingly only when the moss is dry, using an eyedropper or turkey baster to get the water close to the roots. Misting is a close cousin to overwatering, and worse, soggy moss tends to get buggy, even indoors.
“You don’t want bugs crawling out of your centerpiece during Thanksgiving dinner,” Bird said.
The succulent roots will grow into the moss, and the whole centerpiece should last well into the new year if you keep it out of direct sunlight, which can hasten any pumpkin’s demise. I made mine in mid-November and kept it on a protected porch where the succulents thrived and bloomed a few months later. The pumpkin stayed intact until late March.
Fall is prime planting time in Southern California to get berries established for spring harvest and fill your larder with tasty greens, brassicas, peas and root crops all winter long.
When the pumpkin gets soft, simply unpin the plants, gently pry them from the moss and plant them in a pot with well-draining soil. (Note for gardeners: If the pumpkin was organic, with viable seeds, you can dig a hole in your garden and put the decomposing pumpkin there. Cover with soil and water lightly, and eventually you’ll get tons of new pumpkin plants, nourished by the old gourd.)
If you take the plunge, which I heartily encourage, we’d love to hear about your experience and see your finished projects. Share your outcome here, and to my fellow craft-a-phobes, you can do it!
More to Read
Sign up for The Wild
We’ll help you find the best places to hike, bike and run, as well as the perfect silent spots for meditation and yoga.
You may occasionally receive promotional content from the Los Angeles Times.
